Posted on

How to: Arrowhead Necklace

This is one of the most popular necklace designs we sell in the shop – and they’re so simple! Read on to find out how to piece one together….

You will need: 7 x metal arrowhead charms, 8 x 8mm jump rings, chain in a length of your choice (we go for 16″), flat nose plier, wire cutter.

SONY DSC

Using your flat nose pliers, hold one jump ring so that the split in it is at the top of the ring. Use your pliers to ease the ring open by pushing it away from you.

SONY DSC

Loop the ring on to one arrowhead, and then another. Make sure the arrowheads will both be facing the right way when the ring is closed!

SONY DSC

Use your pliers to close the jump ring carefully.

SONY DSC

Repeat this with all your arrowheads, making sure you’ve got a jump ring on either end of the piece.

SONY DSC

Carefully, use your wire cutters to cut your chain exactly in the middle, so you have two equal lengths.

SONY DSC

Attach the chain to either end of the arrowheads using the jump rings.

And that’s it! We have these arrowheads in silver and gold, and both make really beautiful necklaces….

SONY DSC

Posted on

How to: Rain Drop Necklace

You might notice we love working with these tiny glass beads, and the blue/white/yellow combo is one of our favourites for the summer months. This tutorial uses similar tools and techniques to last week’s eyepin necklace, but this one we make with craft wire instead of ready made pins, as it bends a bit better and gives us more length!

You will need:

42 x 3mm blue beads, 32 x 3mm yellow beads, 22 x 3mm white beads (or whatever colours you have/like!)

3 x 12cm strips of 6mm craft wire

Flat nose pliers, round nose pliers, wire cutters

Chain in your choice of colour and length

1 x 8mm ring

SONY DSC

Firstly, using your round nose pliers, grip the end of one piece of wire 1cm down from the top and bend at a right angle. Turn your hand up and over, wrapping the wire around the pliers and making a loop. Don’t panic if it’s not right first time – keep practising!

SONY DSC

Thread 42 blue beads on to the piece of wire, and then trim down so you have 1cm left on the other end too.

SONY DSC

Repeat the earlier steps to make a loop here. You can then bend this into a rain drop shape – pretty!

SONY DSC

Repeat this all with your yellow and white beads to make decreasingly smaller rain drop shapes.

Grab your flat nose pliers, and gently prise open one of the loops on your blue drop by bending it towards you. Now hook the other loop through the open one, and close again. Repeat with the yellow and white drops.

SONY DSC

If your 8mm loop is a jump ring that can be opened, use your flat nose pliers to open it and thread all 3 of your drops on through one of their loops. If your ring doesn’t open (like mine!) you’ll need to reopen your loops, hook on to the ring and close them again.

SONY DSC

Almost there! Choose whichever length and colour of chain & thread you like and simply pop through the ring.

SONY DSC

Voila! One rain drop necklace all finished. Do in many different sizes and colours for much fun and jewellery making joy.

SONY DSC

Posted on

How to: DIY Eyepin Necklace

This jewellery design is yet another wonderfully versatile Bunyip piece – try to look past the beads and imagine this with anything lovely from your stash that could be looped together! As long as the bead fits on an eyepin you can whip one of these up – it could be 3 long lengths of tiny beads, it could be 100 different statement beads all individually looped – the choice is yours!

For this design we used: tiny 3mm vintage glass beads, eyepins, a lobster clasp, one jump ring, flat nose pliers, round nose pliers, and wire cutters.

SONY DSC

To start, thread 12 white beads on to an eye pin.

SONY DSC

Use your wire cutters to trim down the excess at the end of the pin, so you have about 1cm left. Grab your round nose plier, and bend the end of the pin at a 90 degree angle, and then use your pliers to turn the wire up and over to make a loop. (This may take a bit of practise if it’s your first time – keep going!)

SONY DSC
 

Repeat this to make 4 white pins, then repeat to make 6 yellow pins. Next, thread 4 blue beads on to a pin, and work through the previous steps to make 3 shorter pins.

SONY DSC

Using your flat nose pliers, carefully open up one loop on a pin, hook another pin on, and close again. Keep going until all your pins are looped together in whichever order you fancy.

SONY DSC

At the back of your necklace, open up one loop and pop your lobster clasp on. Open up the opposite end and pop the jump ring on.

SONY DSC

And that’s it! Your eyepin necklace is all done. As long as you’ve mastered your loop turning, I think this is one of the most professional (and pretty) ways of turning beads into a necklace.

SONY DSC

Posted on

How to: Drop Earrings

Earring making is one of the most useful and gratifying forms of jewellery making, and once you’ve mastered the basic techniques you can whip up all sorts of beautiful designs mega quickly! Below you’ll find a tutorial to make some lovely & simple drop earrings, that require basic earring making skills (I’ll do my best to describe these below!).

You will need: 4 x drop flower beads, 4 x headpins, 2 x earring hooks, 2 x jump rings, flat nose pliers, round nose pliers. wire cutters.

SONY DSC

First of all, pop one of your beads on to one of your headpins. Use your wire cutters to trim a little bit of excess off the headpin – how much is up to you!

SONY DSC

Using your round nose pliers, pinch the wire about 1cm down from the top, and bend to the side to it’s sitting at a 90 degree angle. Then, using the same pliers, grab the wire right at the end and turn over to make a loop. Repeat on the other pin.

SONY DSC

Use your flat nose pliers to open up one of your jump rings, pop both of your dangles on, and close again.

SONY DSC

Now use the same pliers to open up the bottom of one earring hook, pop the jump ring on, and close. Repeat for your second earring, and voila! All done.

SONY DSC

You can make a huge array of lovely earring designs using only this technique – time to get practising those loops!

SONY DSC

Posted on

How To: Tassel Bag Charm

How to: Tassel Bag Charm

This project has evolved from, like all good projects, our general obsession with tassels. This is a really quick easy make that can be adjusted to include almost anything from your stash box, so don’t feel obliged to recreate ours exactly!

SONY DSC

You will need: One statement bead, one metal charm, one split ring, one bag charm clip, 3 x 20cm strip of suede, craft wire, round nose pliers & flat nose pliers.

First, use your round nose pliers to turn over the end of a piece of craft wire to make a loop, and thread your statement bead on.

SONY DSC

Use the same pliers to make a loop on the other end too – we’ve done a fancy wrapped loop for extra security.

SONY DSC

Next, use the flat nose pliers to open one of your loops, and pop your metal charm. Close it afterwards, making sure it’s securely shut.

SONY DSC

Grab one of your pieces of suede and loop it through the split ring. Tie a normal overhand knot to turn it into a dangle! Repeat with your other two bits of suede.

SONY DSC

Add your bead & charm combo, and then add the bag charm clip too. And that’s it! Fasten to your bag for instant happiness.

Fancy giving it a go? Click here to buy everything you need to make this fab piece (it also only costs £2 – bargain)SONY DSC

Posted on

The Importance of Sequins

sequins bunyip exeter

Ever since I’ve been old enough to dress myself I’ve been old enough to not just want, but need to wear sequins and at any and all given opportunities. So imagine my pure joy to read that not just sequins, but casual sequins were going to be a hot trend for Fall 2016….pass the glitter bucket, I need to submerge myself.

Screen Shot 2016-07-01 at 15.26.16

The love of sequins is a straightforward one – they’re sparkly and bright and attention grabbing and make you look like a walking talking disco ball. Maybe you have to wear a boring uniform to work, or your life is difficult and tedious and you’ve not been having much fun lately? Put on a sequin dress and get ready to be cured of your day to day problems, mainly through the sheer mass of compliments you’ll get from drunk girls in toilets – generally known to be the best people in the world. And if the thought of turning all heads as you Beyonce stride your way into anywhere frightens you, remember that this is yet another joy of sequins: if people are blinded by how fabulous your outfit is, they’re pretty unlikely to notice your adult acne or wonky teeth or that one of your arms is longer than the other. Sequins just give, give, give and ask only that you hoover them up off your bedroom floor on a semi regular basis.

SONY DSC

Even better than this is that this emerging trend absolutely encourages the casual sequin, and presents itself in some awesome daytime staples: sequin jeans, sparkly bomber jackets, shiny silver sweatshirts? Yes please. Why should the sequin queens among us be restrained to nighttime activities only? Pop a sequin jacket on for your morning commute and tell me you don’t feel like a fabulous cross between Lady Gaga and and attendee of Gatsby’s mansion.

Mermaid Sequin Jeans – Topshop

And although writing about the important of sequins makes me feel a bit like Elle Woods writing about the ‘History of Polka Dots’ in Legally Blonde, I think there’s a lot to be said for finding happiness in the small things. Call me shallow or silly but wearing glitter shoes for the day would make me feel just that little bit better about life, and seeing someone on the bus with the confidence to rock a sequin bomber jacket would make me unquestionably joyous.

SONY DSC

Put perfectly for Vogue by Julia Hobbs: “My advice? It’s time to ditch the round-the-clock wardrobe staples. Fail-safe shopping is now a shopping fail; it now pays to look like you’ve had fun in making an effort to dress up. Particularly when your dress lights up the room. Like, actually.”

The timing of this fits in perfectly with the event of the summer: Absolutely Fabulous: The Movie. What better advocate was there ever for OTT dressing than Eddie? In her sunglasses, towering platforms and ‘Lacroix’ emblazoned tops, if we ever needed a poster girl for the fancy-dressing-at-all-times movement it has to be Jennifer Saunders in this 90’s role.

abfab_show_3

This is the kind of trend that obviously makes us deeply happy in craft land because what it means to us is: embellishment. We sell beautiful sequins on their own and by the metre, so you can buy whichever colour you like, and spend an evening adorning all the boring old t-shirts you own. And why stop at sequins? There’s a massive selection of beads that would do just as wonderful a job – tiny glass rocailles to created intricate patterns with, to multicoloured crystal hexagons to stitch around a neckline. More is more with this trend – there’s no such thing as overdressed in this world.

Posted on

How to: Vintage Leaf Festival Hair Crown

How to: Vintage Leaf Festival Crown

Mattie came up with this design while trying to think of new and pretty ways to use our special leaf shaped beads that we obtained in a big haul of vintage stock a few years ago. As with all good ideas, this one involved a crown. Follow our instructions below to make your own beaded crown, sturdy enough to survive the entirety of festival season…


thumb_DSC02259_1024

You will need: 0.6mm wire, vintage leaf beads, vintage pearl beads, 50cm ribbon. This can be done with any beads and ribbon of your choice – as long as their not too heavy to adorn your head all day! We use 0.6mm wire here because it was the thickest we could fit through our leaf beads, but 0.8mm is also great and a bit sturdier (if you can fit it through!)

1. Cut yourself a piece of wire 1 metre long.

2. Start threading your beads on – we threaded two leaves, followed by a pearl, and repeated this pattern.

thumb_DSC02245_1024

3. Once it looks like it’s getting long enough, check it around your head for length. It should sit comfortably on your head like a crown, not fall down and into your eyes.

SONY DSC

4. Where the two ends meet, wrap the wire around each other nice and neatly, and then trim down with a wire cutter so they’re not poking out.

SONY DSC

5. Tie your piece of ribbon so it covers up your wire wrap.

SONY DSC

6. Voila! Wear all day like a festival queen.

SONY DSC

If you fancy giving this a go we’ve put together everything you need in a kit – and with 3 colours to choose from! Check it out by clicking here.

Posted on 2 Comments

5 Reasons We Love The Contemporary Craft Festival

With the Contemporary Craft Festival at Bovey Tracey having finished over a week ago, we’re only just getting ourselves settled back in to normal shop life; featuring indoor trading, ant-free lunches and a notable lack of bar. In memory of another awesome year selling at our favourite show, I thought I’d put together a list of reasons why we’re still quite so obsessed with it. Enjoy!

1. People appreciate a good button

This is in no way to suggest that our regular shop customers don’t appreciate a good button, but if you were to take all the ones who REALLY appreciate a good button and put them all in one place, that place would be the Contemporary Craft Festival. We can take our fanciest, most beautiful, most special buttons and be safe in the knowledge that lots of punters will be excited about them as we are. I suggested this theory to one lady buying some of our enamelled shank yellow flower buttons (swoon), who replied “Yes! I absolutely appreciate a good button.” Case closed.

2. The level of craft wonderfulness

The foundation to why this show is so successful and so popular must be that the level of crafters showcasing their creations inside (and outside!) the marquees is so high. How exciting to walk around the tents, cooing and swooning over all these original handmade products and ideas and to discuss it with the maker face to face. This year both Mattie and I bought something awesome from the gentleman at Vinegar and Brown Paper, which made me proper giddy with excitement. There was also some beautiful work in the start up area, and we both fell for the geometric jewellery at Eleanor Jane Jewellery. I think even with an infinite budget, you couldn’t buy everything you wanted at this show….

3. The community spirit

Mattie thinks this is possibly the 8th/9th year trading over at Bovey, so every year it’s great to catch up with the familiar faces & friends. One of my favourite groups of people to catch up with the show are the guys from Pocketwatch Theatre company, this year dressed up as the Mad Hatter, Queen of Hearts and Alice. They’re some of the friendliest people we get to hang out with every year, and I loved sitting round a toadstool table with them while they drank tea, having a chat with the Mad Hatter about his wooden-spool needs and seeing them under huge rainbow umbrellas when the rain hit. There’s also our lovely friends who run Felt Folk, who truly out glammed us at the private view event on the Thursday – we’ll remember to up our game in 2017!

4. The Little Touches

The whole event was rebranded as a ‘Contemporary Craft Festival’ rather than a Craft Fair a couple of years ago, and when you visit it’s easy to see why. The whole atmosphere of the event makes me feel like something quite like a festival (but much less muddy) – seeing the same people every day, eating all the delicious food (waffles were the best!), seeing people asleep in deck chairs, chatting with strangers all day, and my favourite: 4pm bar run time. Working at the festival is weirdly knackering, so we always treat ourselves to a cheeky glass of wine from the lovely bar around 4pm. It’s a hard life…

5. That’s the way to do it

I’m aware this is an entirely personal one, but for me it’s always Punch and Judy –  potentially, I think, one of the most undervalued comic performances ever. We’ve been there enough years now that we recognise the puppeteer, and I feel in a major way that he is my hero. Last year my mum bought me one of his colour-in posters, which is a very cool sentence and I have no shame about this. The baby getting made into sausages, the crocodile eating people, the devil having fights with Mr Punch? It’s utter madness and I just can’t get enough of it.

This really only covers a very small selection of reasons why this event is so fabulous, and that’s before you even get to the masses of hard work that must go into it from the organisers. If you haven’t been before, we’ll be sure to remind you about it constantly in June next year. See you then!

Posted on 4 Comments

Bunyip & Otton’s Update

If you’ve popped in lately you may have noticed some slight changes to Bunyip & Otton’s since the start of April – although these outward changes have been minimal, we have actually gone through a fairly significant  change in the structure of our businesses. Like all excellent life decisions, Mattie and I had this one after a few glasses of wine in a hotel in Birmingham in February.

SONY DSC

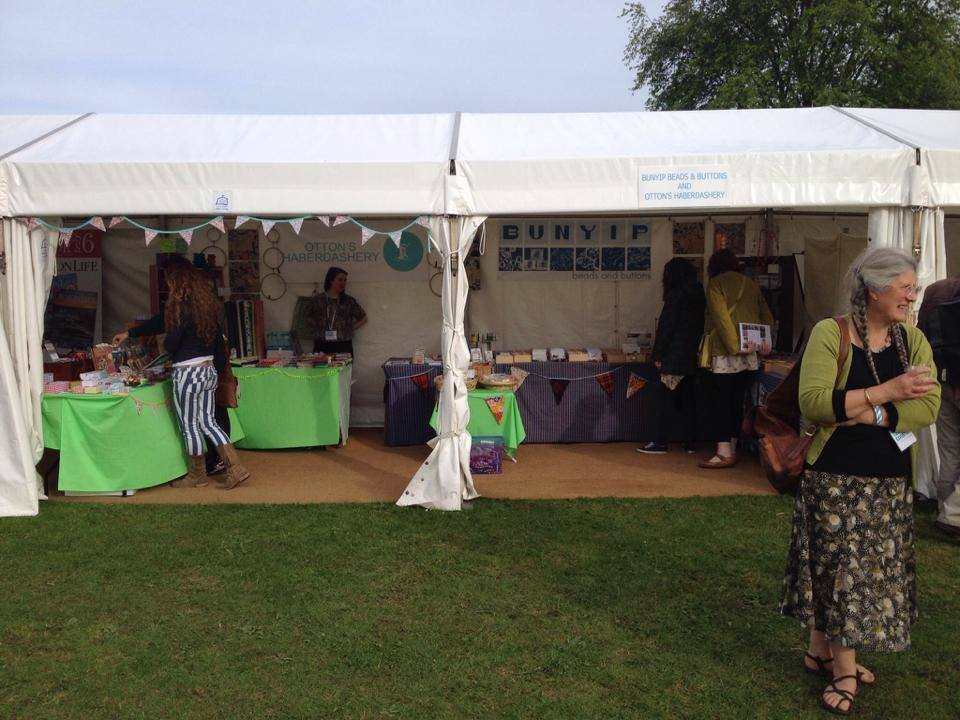
Flashback: since we moved Bunyip out onto Fore Street in 2013 we’ve been functioning as 2 businesses – Mattie’s long standing Bunyip Beads & Buttons, and my own Otton’s Haberdashery. I could never have done this without Mattie & Bunyip (and other wonderful people of course!), from the business starting advice to the friendship support to the relief of so many financial burdens of opening a retail space – especially one in such a big, beautiful and expensive shop!

I’d always wanted to open a haberdashery (well I always wanted to open a ribbon shop, but that’s because I have weird ribbon love that I’m not sure would be reciprocated by the public enough to sustain a business) because I’d always felt most at home when sewing, a feeling that I think you can only relate to about that one thing in your life that makes you feel centered – craft or gardening or dancing or music or whatever it is that makes your soul happy. This has never meant that I’m the best sewer in the world, but I never wanted to be – I just love to make things, and get masses of enjoyment out of the process.

SONY DSC

I opened the shop on very little money, and was incredibly lucky to be allowed to live at home by my ever generous parents, who still continue to house me and make me cups of tea when I’m hungover. This meant that I never had to pay myself from the shop profits, ensuring that I could put almost the entirety of any excess money back into stock, keeping the stock levels as high as I could. The downside to this was that I never had a huge amount of money in stock, with the actual costs of running the previously mentioned big & beautiful retail space meaning I really struggled to build the business – my (respectable) turnover was covering costs and stock but not allowing me the chance to grow.

Speaking of growth, there was obviously my life too. When I opened the shop I was 22, fresh out of University and more than willing to give the shop everything, sacrificing being able to settle myself financially – get a full time job, start paying my student loans back and get a place for myself. The shop is now 2.5 years old, I’m 25 and increasingly desiring the financial stability to start feeling like a fully fledged grown up – or at least a young woman who buys wine that costs more than £4.75 a bottle (joke – I’ll never give you up delicious cheap Sauvignon).

SONY DSC

Back to present day. We’d spent the weekend at the CHSI show in Birmingham, a trade show that in theory showcases the upcoming trends & hot items for the next year. What we’d noticed, even with our hangover heads on, was that it was all sewing related. Beautiful fabrics and contemporary kits – this was where all the innovation was. This was pretty deflating for me, since I wanted to buy so many wonderful things, knowing that they’d sell to our super cool customers (hey guys) and that they would be as excited by them as I was – I just didn’t have the money to put into it, especially with rent day looming. This is when the idea presented itself – Mattie offered to buy my business, giving me enough financial stability to move myself and the business forward. Under her ownership the shop could really grow, gaining all this wonderful stock that it so desperately needed and really allow it to flourish in the way that I always wanted it to.

SONY DSC

To be honest, I jumped at this idea. Although I loved owning the business and being self employed (well, it has its moments!) I really felt like this wasn’t about me. I wanted the shop to reach its full potential, and I knew that I wasn’t able to do this, at any time in the near future at least. The real thing that sealed this deal was Mattie’s other offer, to employ me full time. So for me, I would now be getting paid more than £1 an hour (genuinely what I was paying myself a lot of the time), would still get to do the best job in the world and would get to see the shop, hopefully, grow and conquer Exeter, and then the world. Easy decision.

SONY DSC

Now the important bit – how does this affect you, wonderful customers & friends of Otton’s Haberdashery? It doesn’t! The shop is still functioning in the same way, I’m still here, the stock is still here, it’s all just hopefully more awesome than it was before (it so is – even just a month in!). The Otton’s website will eventually have all its shop items moved over to the Bunyip website, and you may just notice a decline in my Otton’s social media posts. This is only because I’m now concentrating on the Bunyip Beads pages – it’s still me writing the posts, just in a slightly different location. We hope to rebrand the entire shop at some point, as our craft offering is becoming more and more diverse and it would be great to have a name to reflect this. But all in good time – the next year should be really, really exciting for Mattie and I, and the other badass Bunyip ladies.

SONY DSC

In summary, keep coming in to see us in the next few weeks and months, because we have loads of exciting things to buy and share with you, and new awesome workshops to get you involved in too. Stay in touch on the Bunyip social media – facebook, twitter, instagram as linked.

If you’ve made it to the end of this, I salute you. Thank you for reading! And for being our customers and friends – I hope this is all as exciting for you as it is for me.

Lily x