
Hello!
This week’s DIY is this simple Wave Necklace, made from these ‘S Tubes’ that we sell in the shop. Their wiggly shape makes for a pretty necklace that looks more complicated than it is (e.g. our favourite kind of make…)

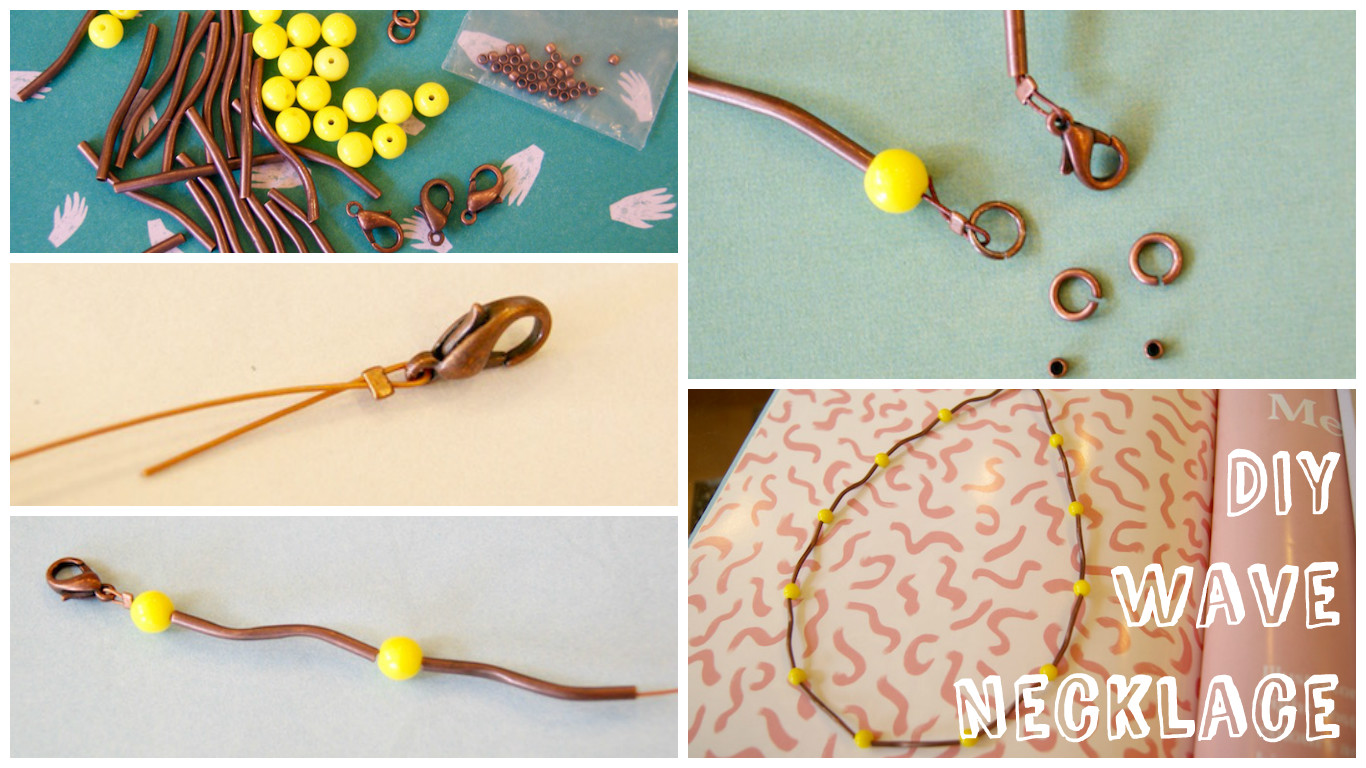
For a 45cm necklace, you will need:
12 x 33mm copper S tubes
13 x 6mm yellow glass rounds
1 metre of tiger tail
2 x crimps
1 x copper lobster clasp
1 x copper jump ring
Flat nosed pliers
Obviously, all the colours and sizes here are totally open to interpretation – the technique will work with whatever you have at home!

Firstly, thread one of your tiny crimp beads on to the end of your tiger tail. I said you need two crimps in the intro, but this does not include all the ones you drop on the floor (at least another 18).
Thread your lobster clasp on to the end, and then push the end of the thread back through just the crimp bead. Tuck it up nice and close to the clasp, and give it a squish with your plier. Explanatory photograph may be useful:

Tada! That is literally the most complicated part of this tutorial.
Now you can start threading your beads on. We go for a tube, followed by a round, and on and on until it’s the length you’re after. Your first few beads should tuck over both threads so it’s all neat and beautiful.

When you get to your desired length, pop another crimp bead on, pop a jump ring on the thread, and then push the end of thread back through the crimp, and hopefully a couple of beads too, tucking it away nicely.
Give it a squish!

Even just doing these photos I lost about 12 crimps.
And that’s it! Simple as that. I LOVE tiger tail – it’s so simple and I think it looks so much nicer than knotting.