
This jewellery design is yet another wonderfully versatile Bunyip piece – try to look past the beads and imagine this with anything lovely from your stash that could be looped together! As long as the bead fits on an eyepin you can whip one of these up – it could be 3 long lengths of tiny beads, it could be 100 different statement beads all individually looped – the choice is yours!
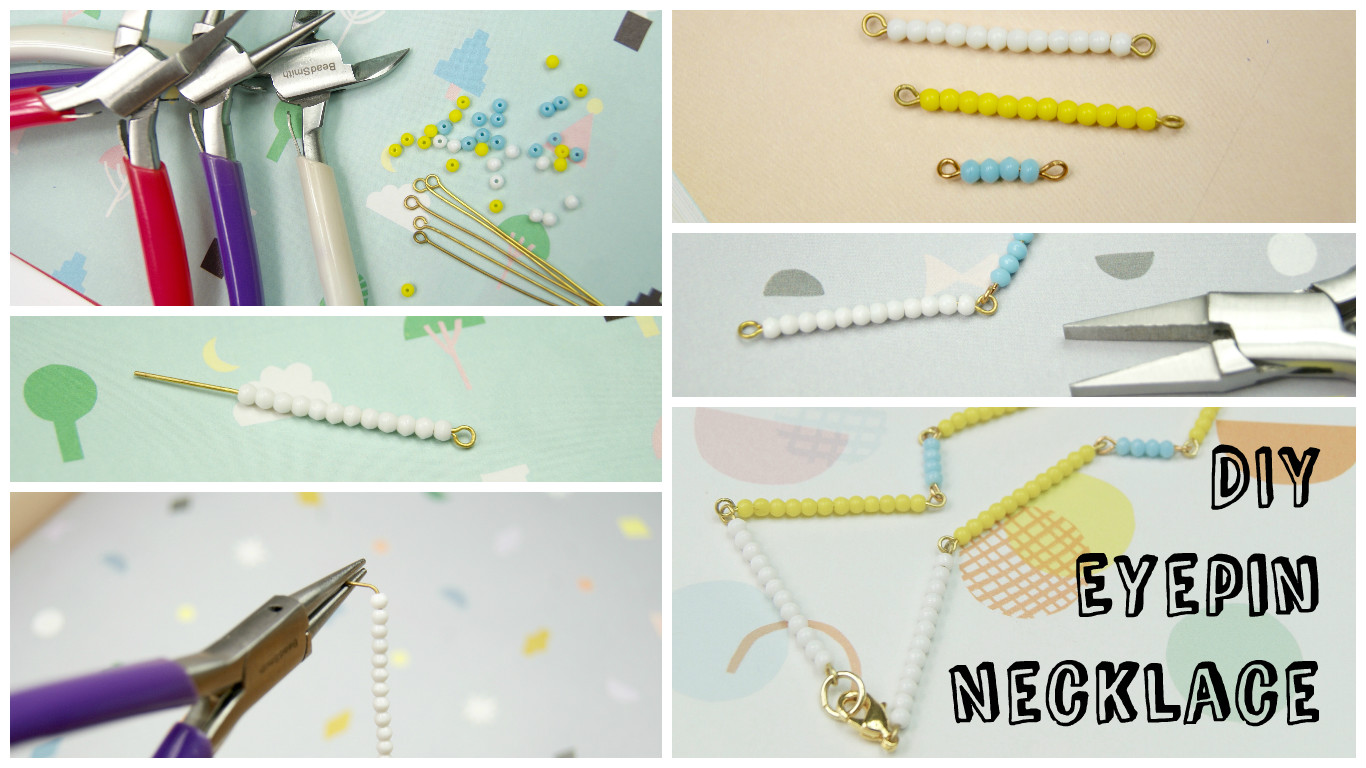
For this design we used: tiny 3mm vintage glass beads, eyepins, a lobster clasp, one jump ring, flat nose pliers, round nose pliers, and wire cutters.

To start, thread 12 white beads on to an eye pin.

Use your wire cutters to trim down the excess at the end of the pin, so you have about 1cm left. Grab your round nose plier, and bend the end of the pin at a 90 degree angle, and then use your pliers to turn the wire up and over to make a loop. (This may take a bit of practise if it’s your first time – keep going!)

Repeat this to make 4 white pins, then repeat to make 6 yellow pins. Next, thread 4 blue beads on to a pin, and work through the previous steps to make 3 shorter pins.

Using your flat nose pliers, carefully open up one loop on a pin, hook another pin on, and close again. Keep going until all your pins are looped together in whichever order you fancy.

At the back of your necklace, open up one loop and pop your lobster clasp on. Open up the opposite end and pop the jump ring on.

And that’s it! Your eyepin necklace is all done. As long as you’ve mastered your loop turning, I think this is one of the most professional (and pretty) ways of turning beads into a necklace.
