Posted on

How to: Turquoise Wire Earrings

This week’s How-To is these ridic pretty turquoise and rose gold earrings, since a) we haven’t delved into wire wrapping yet and b) I think about rose gold all day every day. It was suggested a couple of days ago that I should take off one of my many rose gold accessories, since wearing them all while typing on my rose gold macbook (oh yeah that’s right) was potentially ‘too much.’ I laugh in the face of ‘too much.’

Anyway, these are really straightforward to make once you’ve mastered the art of wire wrapping, which can be a bit fiddly to get to grips with. Luckily we sell craft wire in big rolls so you can practice lots…

You need:

2 x turquoise chunks

2 x rose gold earring hooks

6mm rose gold craft wire

Flat nose pliers, round nose pliers & wire cutters

SONY DSC<aling

My camera hates me for trying to take photos of big and small things at the same time.

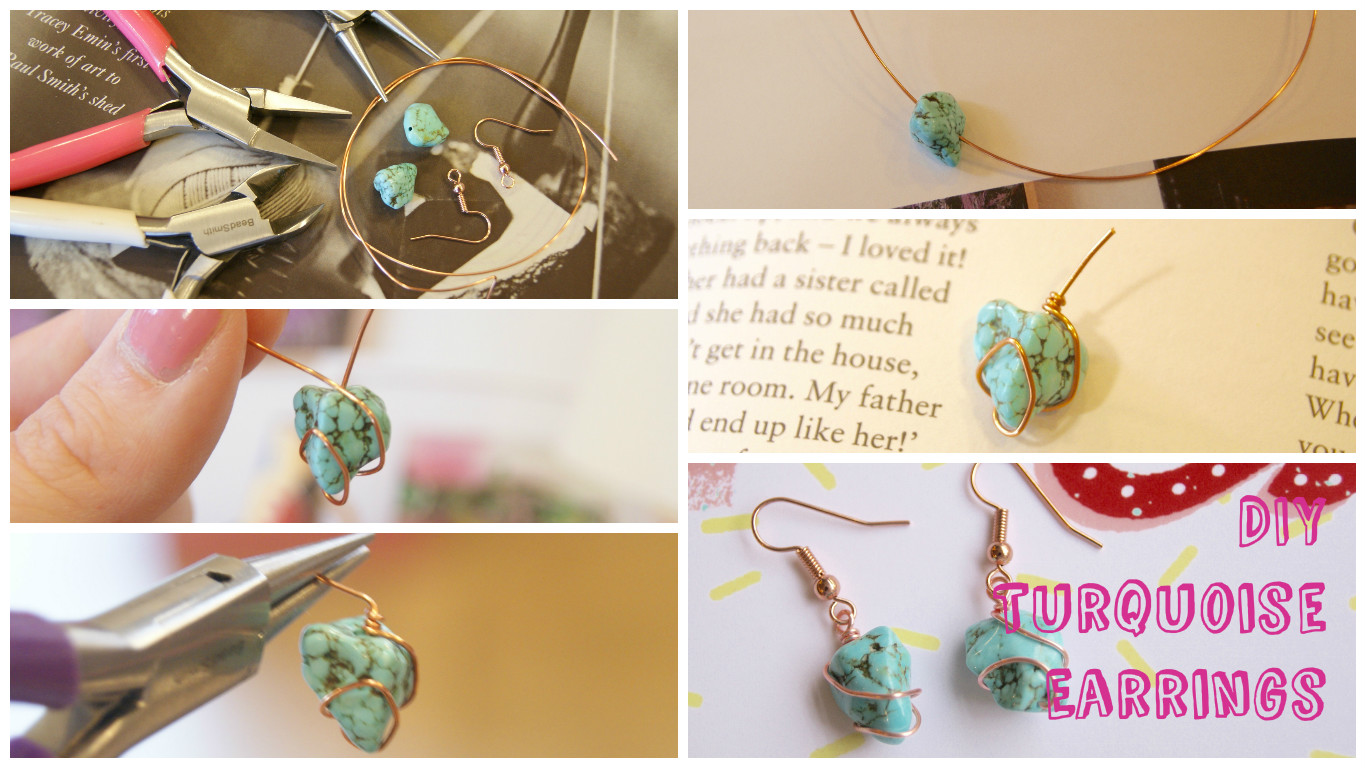
First of all, pop a turquoise chunk on a 10cm piece of wire. You want it about two thirds of the way along…

SONY DSC

Now, take the longer end of wire and wrap it all the way around your bead, a couple of times if you can. Use your fingers to push it close to the surface on the turquoise – we don’t want any unsexy gappage here.

The aim is to meet the two bits of wire at the top, like so:

SONY DSC

Now, this is the bit that can take a bit of practice. What you want to do is wrap the long piece of wire really tightly in a lovely coil around the short piece of wire, at the point where it comes out of the bead. This photo will help explain this:

SONY DSC

I find it helps me to really pull the wire hard outwards, as I’m rotating it around the other wire, to ensure a beaut tight coil.

Once you’ve smashed that step, use your wire cutter to trim off the messy piece of long wire that’s left. You should now have what the children in my workshops call ‘a bead on a stick/a balloon/a lollipop.’

Trim the remaining straight piece of wire down to 1cm.

SONY DSC

Now take your round nose pliers and bend the 1cm of wire over to a nice right angle.

SONY DSC

Gripping the wire right at the very end, roll your pliers over to make a lovely loop. Again, this might not be perfect first time, but that doesn’t matter! The great thing about wire is you can just chop it off and start again until it’s how you want it.

And that’s it! Just use your flat nose pliers to open the loop on the bottom of your earring hook up, pop the turquoise dangle on there, and close it again.

SONY DSC

Isn’t the lighting in this photo nice? That’s because I went and stood in the street to take it, like a lunatic.

Is it important to mention that you have to do all the above stages twice to get two earrings? If you’re sitting with just one and you’re tired just pop it on a chain and have it as an extremely pretty pendant.

Happy Friday! xx

Posted on

How to: DIY Eyepin Necklace

This jewellery design is yet another wonderfully versatile Bunyip piece – try to look past the beads and imagine this with anything lovely from your stash that could be looped together! As long as the bead fits on an eyepin you can whip one of these up – it could be 3 long lengths of tiny beads, it could be 100 different statement beads all individually looped – the choice is yours!

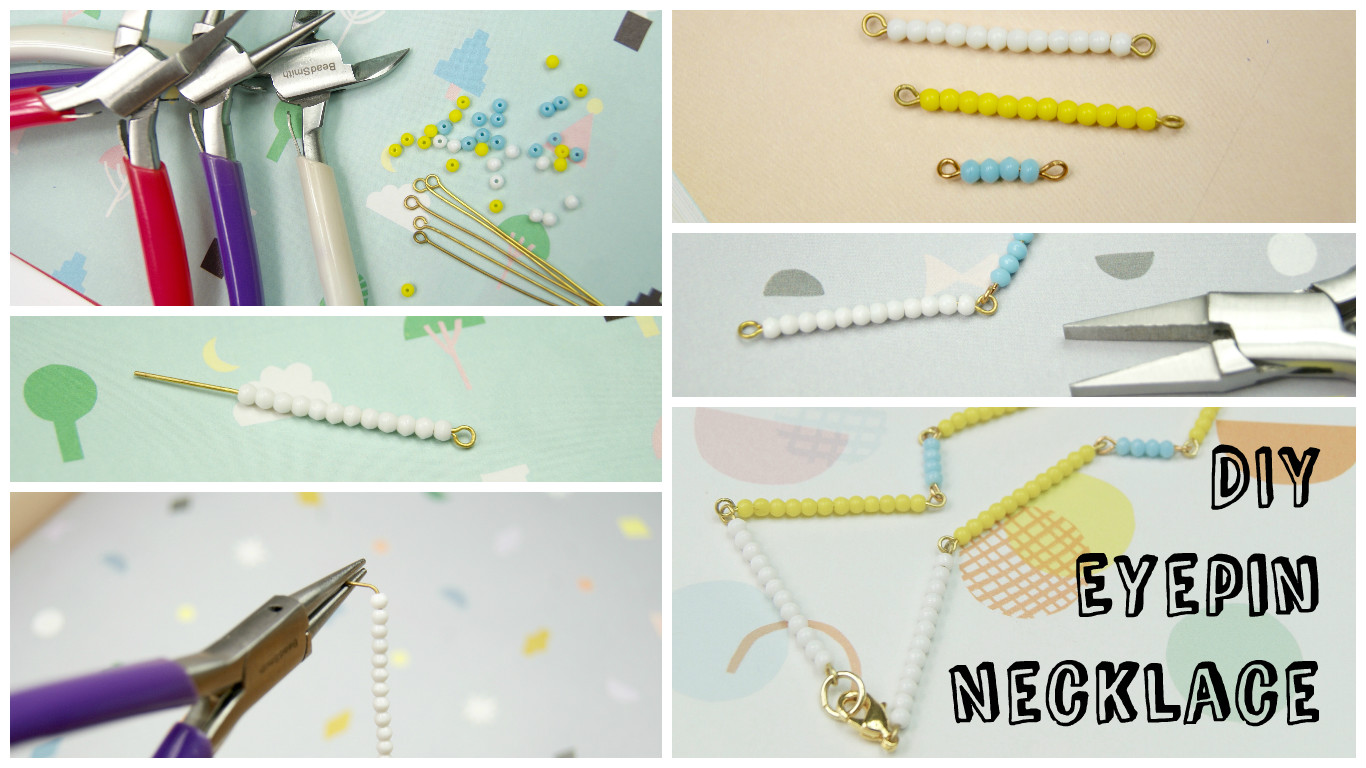
For this design we used: tiny 3mm vintage glass beads, eyepins, a lobster clasp, one jump ring, flat nose pliers, round nose pliers, and wire cutters.

SONY DSC

To start, thread 12 white beads on to an eye pin.

SONY DSC

Use your wire cutters to trim down the excess at the end of the pin, so you have about 1cm left. Grab your round nose plier, and bend the end of the pin at a 90 degree angle, and then use your pliers to turn the wire up and over to make a loop. (This may take a bit of practise if it’s your first time – keep going!)

SONY DSC
 

Repeat this to make 4 white pins, then repeat to make 6 yellow pins. Next, thread 4 blue beads on to a pin, and work through the previous steps to make 3 shorter pins.

SONY DSC

Using your flat nose pliers, carefully open up one loop on a pin, hook another pin on, and close again. Keep going until all your pins are looped together in whichever order you fancy.

SONY DSC

At the back of your necklace, open up one loop and pop your lobster clasp on. Open up the opposite end and pop the jump ring on.

SONY DSC

And that’s it! Your eyepin necklace is all done. As long as you’ve mastered your loop turning, I think this is one of the most professional (and pretty) ways of turning beads into a necklace.

SONY DSC

Posted on

How to: Drop Earrings

Earring making is one of the most useful and gratifying forms of jewellery making, and once you’ve mastered the basic techniques you can whip up all sorts of beautiful designs mega quickly! Below you’ll find a tutorial to make some lovely & simple drop earrings, that require basic earring making skills (I’ll do my best to describe these below!).

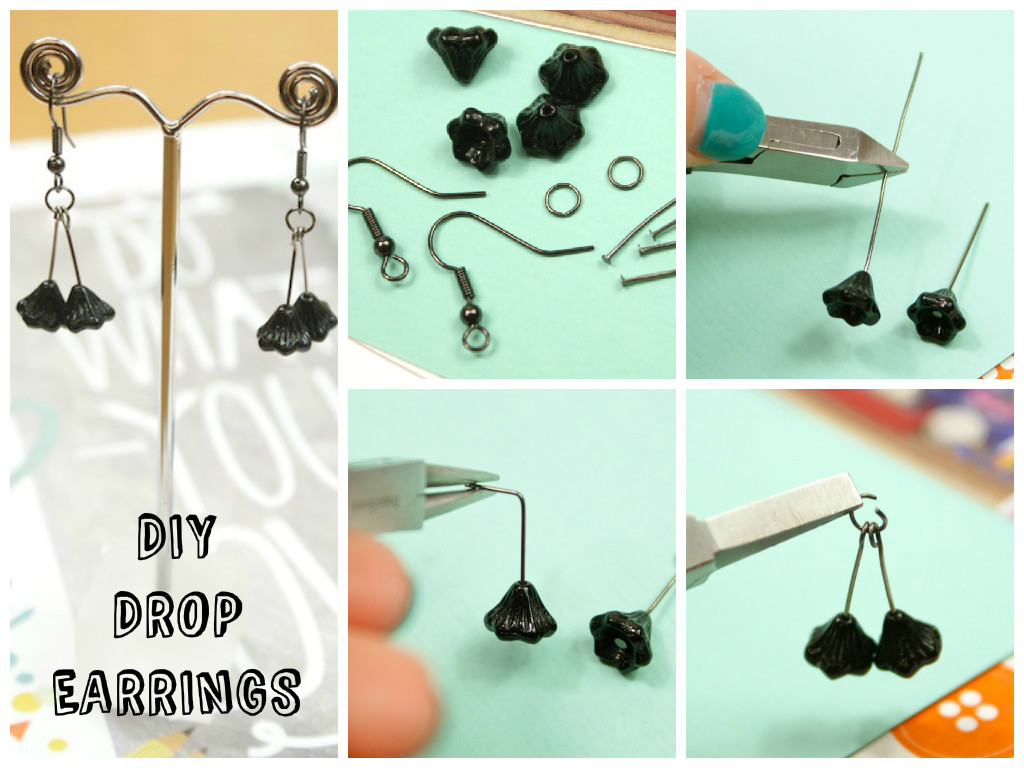
You will need: 4 x drop flower beads, 4 x headpins, 2 x earring hooks, 2 x jump rings, flat nose pliers, round nose pliers. wire cutters.

SONY DSC

First of all, pop one of your beads on to one of your headpins. Use your wire cutters to trim a little bit of excess off the headpin – how much is up to you!

SONY DSC

Using your round nose pliers, pinch the wire about 1cm down from the top, and bend to the side to it’s sitting at a 90 degree angle. Then, using the same pliers, grab the wire right at the end and turn over to make a loop. Repeat on the other pin.

SONY DSC

Use your flat nose pliers to open up one of your jump rings, pop both of your dangles on, and close again.

SONY DSC

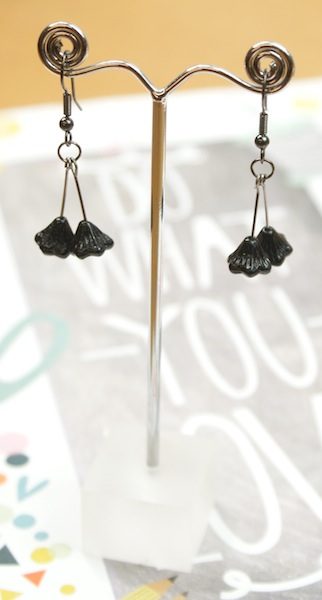
Now use the same pliers to open up the bottom of one earring hook, pop the jump ring on, and close. Repeat for your second earring, and voila! All done.

SONY DSC

You can make a huge array of lovely earring designs using only this technique – time to get practising those loops!

SONY DSC