Posted on

June Challenge – Slippery Fabrics

I can’t actually believe that I’ve stuck with this challenge for a whole 6 months! I honestly thought I’d do January then get bored… but I’ve surprised myself and have managed to persevere. So last month was working with slippery fabrics and as Devon is going through an insane heatwave, I decided to work with velvet. Yes, velvet in 30 degree heat! So I won’t be wearing this dress any time soon but I couldn’t resist the beautiful fabric and it definitely fitted with the challenge as it was indeed slippery.

I found out quite quickly that velvet looks different depending on which way up you cut it. One way is light and the other creates a rich, darker colour. Of course the first piece I cut out was the light version which I didn’t like as much so there was much swearing, re-cutting and really trying to squeeze the pieces out of the fabric that I had left. Now this is fairly standard for a sewing project but cutting velvet is an actual living nightmare and I wasn’t best pleased with having to do it more than I had to. As you would expect, it slips and slides all over the place. There were lots of sharp pins and a rotary cutter involved and it was still tricky.

After a good couple of hours I had all of my pieces cut out and couldn’t resist fitting them on my mannequin to see how it draped; I just love how it looks on the skirt pieces. And this is how it stood for the majority of June… standing there, looking pretty but very much not in a ‘finished dress’ way. It’s not that I didn’t have the time; I made several other non-sewing challenge items. It’s that I thought that if cutting the fabric was as bad as it was, what on earth would the sewing be like?

In the end, I needn’t have worried as I finished it all in a couple of hours and didn’t come by very many issues at all. I think this was down to a couple of reasons: lots of pins and a walking foot. The only time I had a problem was right at the end when I was rushing the waist and didn’t bother to use as many pins as I had before so of course both sides slid away from each other.

I didn’t actually try to sew this velvet without a walking foot but I imagine the outcome would have been messy and inaccurate. The foot works by providing an extra set of feed dogs for the top of the fabric being sewn so keeps everything where it should be. It meant that my sewing was stress free and my fabric wasn’t chewed up or destroyed.

I’ve learnt that slippery fabric (or at least velvet) isn’t too horrendous if you have the correct tools to make it work. I’m pleased with the dress and, even though I can’t wear it any time soon, I will be well kitted out for any Christmas parties that might happen!

So here is my Christmas dress… in June!

Posted on

February Sewing Challenge – Ergh… Sleeves

I have learnt one thing from my February challenge… I do NOT enjoy setting in sleeves. It’s hard and time consuming and I’m pretty sure I still haven’t cracked it (Rome wasn’t built in a day and all that). Sadly this won’t be a tutorial that you can follow to get the perfect sleeve but at least you can share in the experience…

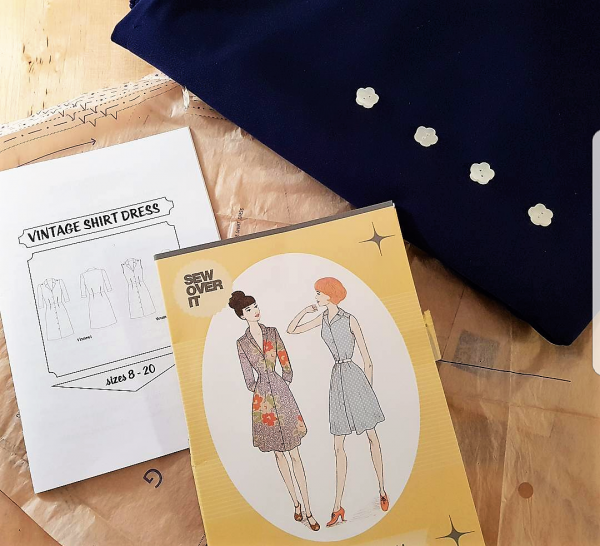
I did A LOT of research for the February challenge. In fact, most of my work for the month was just reading stuff (if you are interested take a look at Tilly’s advice for creating a gathered sleeve) and begging for advice from the Sewing Challenge Facebook group. I decided I did actually need to produce something though and that something was going to be the Sew Over It Vintage Shirt Dress.

I decided to do my first attempt on calico so it didn’t matter if it went wrong. I adjusted my stitch length to the longest it would go and did my two lines of stitches which I would technically use to create my gathers. I then pulled the threads to gather the sleeve and spread it out so that it wasn’t too bunched up. I think in the future it’d be good to use a different coloured thread for the bobbin so I can see which one needs to be pulled. To get to this stage took a long time and I used my knee to try and manipulate the shape!

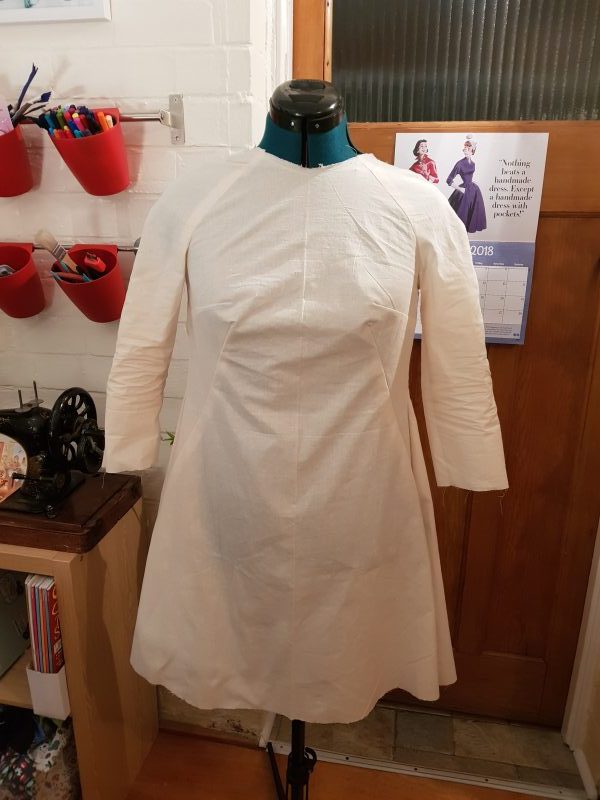
After a lot of procrastinating, I moved on to my actual fabric. Just to keep me on my toes, I decided to use a nice slippery and slightly stretchy fabric… After cutting, overlocking and creating a mock turn-up cuff, I proceeded to spend a huge amount of my time trying to get the over-sized sleeve to fit into the smaller sleeve hole while using all of my pins to do so. At one point I really did question if I actually needed to have movement for my shoulders.

The first picture was my first attempt. Note those tucks at the top there… they were not part of the pattern. I huffed, puffed, swore a bit and shut the dress away for the night. With a fresh head and a more objective pair of eyes, I looked at the dress again and realised that actually, they were to wide for my shoulders. By pure chance, that meant that I needed to increase the seam allowance at the top of the sleeve, thus hiding the tucks. Hurrah for my abnormally shaped shoulders!

So despite bodging it a bit… I managed to finish the dress (while learning lots of other skills along the way). I may avoid setting in sleeves like the plague in the future but I have a dress that shows that, one time, I did it (half) successfully.


Posted on

January Sewing Challenge – Adjusting Patterns and making a toile

So often, in the past, I’ve dived straight in to a project only to finish it and find it doesn’t fit me properly. It does make perfect sense, we’re never all going to be the exact size of the pattern; there’ll always be the odd thing that needs a tweak. This month I wanted to remedy this by practising adjusting patterns and in particular making a toile.

What on earth is a toile you ask!

It’s basically an early version of a pattern made up of cheap fabric so that sizing adjustments can be made without ruining beautiful fabric. You’d use a fabric that is similar to what you’ll use for the final piece and trace any changes to make a perfect pattern. I’ve always put it off in the past because it seems counterproductive to pre-make a garment when you have no intention of wearing it. But my 2018 challenge is to do things that I don’t usually do so here it goes.

I bought some really beautiful fabric a while ago but had been putting off making with it because the thought of ruining it terrified me! So it seemed like the perfect time to make a toile so that I could check the fit.

My toile for the Tilly and the Buttons ‘Francoise’ dress.

This is my finished toile which I also tried on myself and pranced around in to check movement of course. It turned out that the fit was pretty good. I have fairly standard measurements apparently so I didn’t need to adjust the bust which is often the main problem area.

One thing I did decide to change was the sleeve. On the long sleeve, little creases appeared quite quickly around the elbow; I don’t like ironing so this wouldn’t do at all. I took off the sleeve on my toile and traced it onto paper, making sure that I included all the markings from the original pattern.

So overall a great success and I had the confidence to cut in to my beautiful fabric knowing that the fit would be good.

Just the one toile was not enough though; I wanted a challenge. This time I decided to make one for a pair of fitted trousers and boy am I glad I did. The fit of my toile was all wrong and didn’t lay properly near the ankles. So with a little bit of a helping hand I pinned in the areas that needed pulling in and marked the changes with a pen. I then took everything apart and this time, used the toile as my pattern piece. I used carbon paper and a tracing wheel to transfer the markings on to my trousers fabric (polka dot trousers anyone?).

So, making a toile IS extra effort and I wouldn’t do it for everything but it is a great way to get a good fit and to eliminate the fear of ruining fabric.

Posted on

2018; A New Year, A New Challenge


Is anyone else setting themselves a crafty challenge for 2018? If you’re anything like me, you’ve tried before and given up by mid January! So I’ve decided that I’ll use this blog to keep me motivated and share my experiences with you.

I’m a fairly confident sewer but I do have those favourite patterns that I just make over and over again (I’m on number 3 of the Cleo Dress by Tilly and the Buttons). So 2018 is the year when I step out of my comfort zone and try some completely new things and improve some skills that I just never use at the moment.

My plan is to practise a skill each month and to share the ups and downs with you.

So in 2018 I’ll no longer be a ‘try-it-and-see-sewer’ and will not have to use the seam ripper at all (HA!).

Do you have any crafty new years resolutions? Does the #sewingchallenge2018 sound up your street? We’d love to see what you’re all up to.