Posted on

Project of the month: How to make a Pin Cushion

You will need:
Materials:
x2 Different fabrics 15cm x 15cm
x1 Button between 15mm
2m Embroidery thread
Toy Stuffing
Tools and Equipment:
Sewing Machine,
Thread,
Pins,
Needle,
Fabric Scissors,
Pinking Shears
Pen / Tailors Chalk,
Iron and Ironing board,
a bowl / something with a curve to
draw round, Let’s get making!

1. Grab both of your fabrics and draw around your bowl – this can be any size just bare in mind that your finished pin cushion being full of toy stuffing by the end will be padded therefore raised so it will appear slightly smaller by the end.

2. Cut out your fabrics and place them right sides together and stitch around the edge with a 1cm seam allowence, leaving a gao of roughly 5cm for turning.

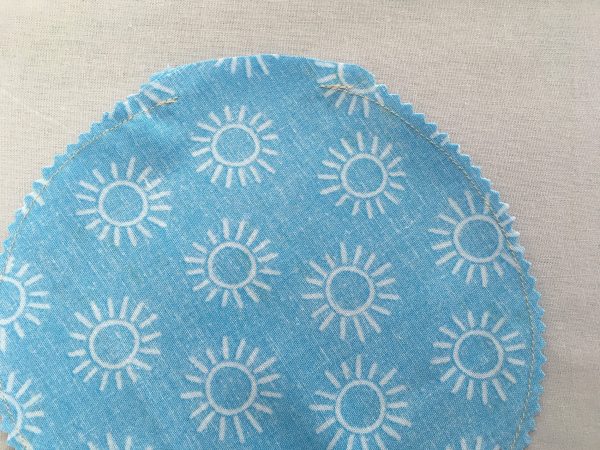
3. Use your pinking shears to trim the edges, press with an iron and then turn – use a large knitting needle or even a pen with the lid on help turn the edges and then press with an iron again.

4. Now stuff your pouch with toy stuffing, using small amounts at a time helps to get an overall good level of even ness, when full use slip stitch to finish off.

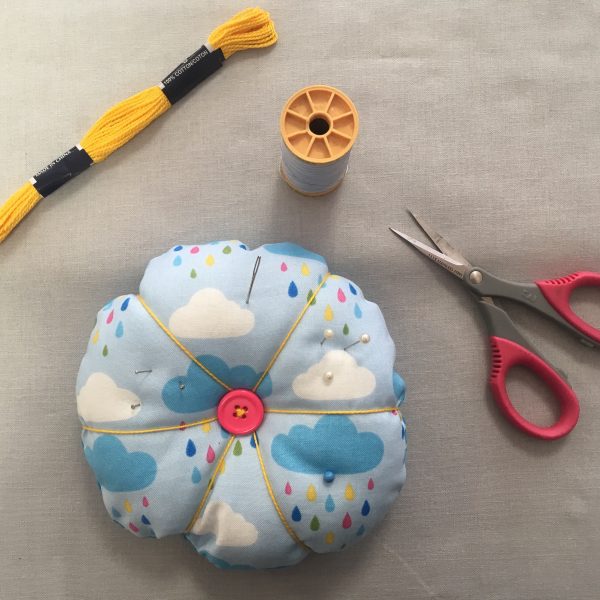
5. Next grab your embroidery thread, thread onto a needle and tie a good knot at the end. Find your centre point of your cushion and stitch down, and bring thread through – don’t worry about the end thread and the knot it will soon be hidden! Bring your thread around the edge of your cushion and then stitch down all the way through again. And again 6 or 8 times – see photo for example, try to keep each section even it’s sometimes easier to neaten up when they’re all done as then you can compare them to each other.

6. With the last bit of your embroidery thread stitch up. Now stitch on your button 2 – 3 times up and down through the whole cushion should be plenty. Knot and tuck the thread in and snip – see our stories on instagram saved in the highlight section if you need and extra guide.

And there you have it! Please let us know how you got on with this project and if you share on social media tag us in with #bunyippotm so we can see them!

Posted on

Project of the Month: Cross stitch Needle Case

We have a lovely new member of staff, Alice who is an amazing sewer and makes the cutest things. She’s going to be making different projects using fat quarters and this month she’s made this adorable needle book. Here’s how to make your own. 

qrf

You will need:

Your favourite cross stitch design, Aida Fabric, Embroidery thread, 
Fabric & Felt in 2 Contrasting Colours

Tools and Equipment:

Sewing Machine, Thread, Fabric Scissors, Ruler, Pen / Tailors Chalk,
Iron and Ironing board, Pinking Shears.

Let’s get making…

1. I’ve used a design from Hygge, issue 162 of the Rico Embroidery Series of Books, which are fabulous (come and see them in the shop). The size of the design you choose will define the size of your needle case. The design I went for ended up with a final size of 3.5cm by 6.5cm, which is pretty small so I wouldn’t recommend going any smaller than this but you can go bigger!

2. Sew your lovely design and then draw a rectangle / square around it with a 2cm border. 1cm of this will be the seam allowance (which will continue through all of this project) then the remaining 1cm will act as a border around your design. Cut.

Using your fabric, cut out the same size piece as you’ve just cut, then place on top of each other front sides facing, and pin.

3. With your aida fabric on top, stitch down the right hand side using the holes / lines in the aida fabric to keep your stitching straight.
Open out the seam and press with an iron.

4. Now cut out from your remaining fabric a matching rectangle (double the size of your first piece of fabric), place on top of sewn pieces, front sides together and pin.
Stitch along 3 sides of your fabric. Top, Right and Bottom, leaving a hole in the whole of the left hand side.

5. Snip the corners, turn and press. Next turn in the whole rough edge 1cm, press with an iron and then stitch as close to the edge either by hand or machine.

6. Prep your felt. You want one piece of felt 1/2cm smaller than your aida size, and another 1cm smaller. For example my finished stitching leaves a rectangle of 10cm x 8cm. I’ve cut one rectangle 9cm x 7cm and another 8cm x 6cm.

7. Layer up your felt going in order: Smallest piece of felt on top, then the larger piece of felt, then the rectangle of fabric on the bottom with the section of cross stitch on the outside.

8. Pin in place and flip the whole thing over so you are now looking at your cross stitch design and the other half of fabric. Stitch down the join between your aida and fabric so that the stitches are relatively hidden from the outside.

And you’re done! You should have a little book like needle case with multiple pages to keep you pins and needles nice and safe!

9. Share your amazing needle book on our social media page!