Posted on

Project of the Month: Embroider a Rainbow Hoop

You will need (For our size project – you can obviously go much bigger if you’d like!)

Materials:

5” Embroidery Hoop Piece of plain fabric 20cm x 20cm

(we’ve used white but could look great with a sky blue!)

Piece of Felt 20cm x 20cm

X6 Different colours of embroidery thread

Tools and Equipment:

Embroidery needle, sharp scissors, Tailors chalk / erasable pen,

Fabric Scissors

Let’s get Making!

Press your fabric into your hoop – make sure it’s nice and tight a bit like a drum!

Draw on your rainbow *Top Tip!* Find a rainbow shape on your laptop or computer, whack the brightness up and lay your fabric over the screen. Trace the rainbow onto your fabric!

Measure out our thread to 50cm, then split your thread in half so you’re using 3 of the inner threads at a time – makes for easier stitching into fabrics and make your thread last twice as long!

We’re using our colours in this order (from outside to inside) Red, Orange, Yellow, Green, Blue, Purple but feel free to mix things up and make it even more colourful! Also using a different stitch for each line of the rainbow, however you could always use the same stitch for each or 

  1. The Red line – chain stitch.
  2. Orange – Couching
  3. Yellow – Running Stitch
  4. Green – Stem Stitch
  5. Blue – Back Stitch
  6. Purple – French Knots

Now to neaten up the edges of your fabric. Keeping your fabric in it’s hoop (You may want to pop it out and then re-stretch it so it’s nice and tight again) cut your fabric into a circle roughly 1 inch larger than your hoop. Grab a needle and thread and do a large running stitch around the edge of the circle (not too close to the edge about 5mm from the edge. When you get back round to the beginning of your running stitch pull your thread and it will gather the fabric to the back of your hoop! Knot in place.

Next grab your felt and cut it into a circle slightly smaller than your hoop – an easy way to do this is to draw around the hoop onto your felt and then cut it inside of the drawn line.

Either Glue or stitch your felt onto the back side of the hoop.

There you have it! Please let us know how you got on with this project and if you share on social media tag us in with #bunyippotm so we can see them!

If you’re unsure of any of the stitches keep an eye out for another blog post coming.

Posted on

Project of the Month: How to Make a Ribbon Rosette Brooch!

You can obviously adapt this project depending on the width of your ribbon and your desired brooch size, for this project our ribbon is 16mm wide and 1m in length.

Materials:
1m of ribbon – we’ve used tarten to get ready for Burn’s night!
Brooch back
Small – mediem size button
Tools and Equipment:
Thread,
Pins,
Needle
Pair of sharp scissors

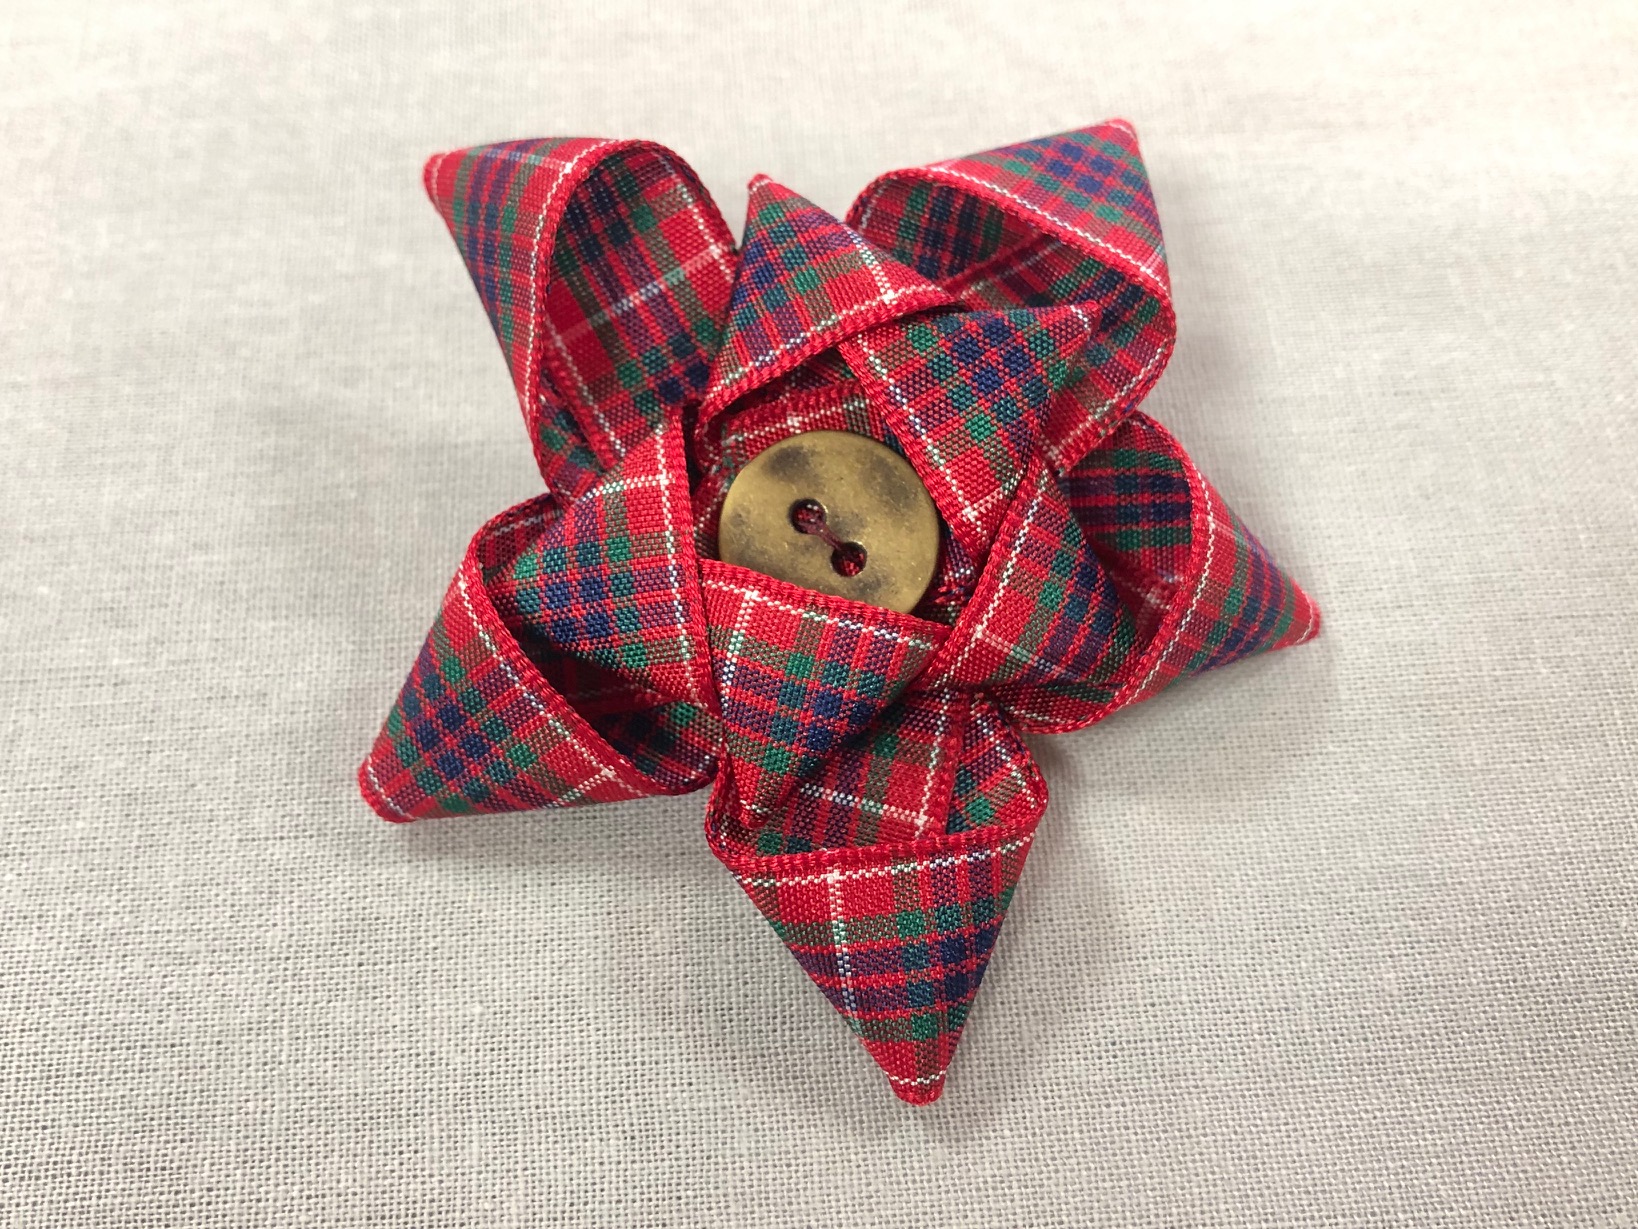
1. Have one end of your ribbon in the you hand and be working with the long length. Curve your ribbon in the way shown in the photo, try to have the curve quite pointy as it helps to keep it in shape. Then have your long length meet in the middle but turn it slightly so that it pokes out at a slightly different angle to the first point. This way when you make another point it won’t just keep coming back to the same point. Think of it as your point is 12 on a clock and the two ends are at 4 and 8. It’s quite difficult to explain so please see the photos for this to make more sense =P

2. Keep going round making more ‘points’ till you have a nice full circle – we made 5 but you could keep going and make them longer and have even 10 to make a much larger rosette!

3. Now work round again but making the points much smaller so that they make a mini circle in the bigger circle. It can be quite tricky keeping all of the ribbon in neatly and together at this stage so you could pop a pin in to keep the first circle in the place.

4. When you’re happy with the number of points pop a pin in the keep it all in place and grab your needle and thread. Do several stitches up and down in the middle of the rosette going through ALL of the layers. This should be enough to keep all of the ribbon in the place but you can add a few more stitches to the underneath layers being careful not to catch down any of the loops.


5. Next trim off your excess ribbon and stitch on your button to hide the end of the ribbon. (You can keep using the same piece of thread, you don’t need to knot and cut it off till the end!

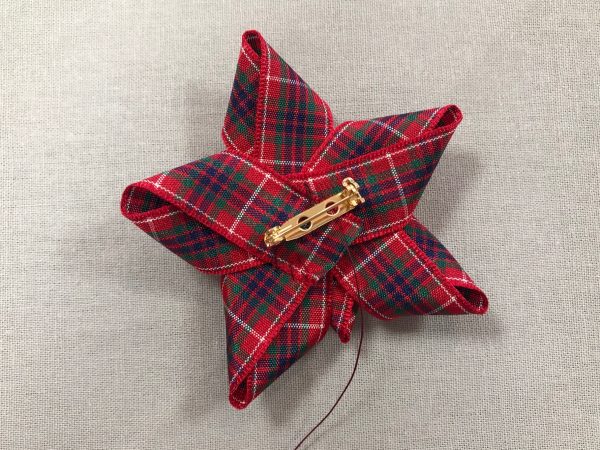
6. Now stitch through to the back of the brooch and sew on your brooch back. Several stitches till it’s nice and secure, Knot the thread, trim off the excess and ta-da!

Please let us know how you got on with this project and if you share on social media tag us in with #bunyippotm so we can see them!