

How to Make an Infinity Scarf

This awesome necklace design came into the world because of what I can only describe as a…slight excess….of certain colours in our crystal hexagon range (also know as: we have one million orange crystal hexagons dear lord let’s make something with them).

Despite this creation of convenience, this is one of my favourite designs that Mattie has ever come up with, essentially because it is massive and heavy and looks super cool in all colours….I photographed the blue version here, but I hear that the orange is particularly beautiful.
You will need (to make an 18″ necklace):
120 x crystal hexagons (we sell these in the shop in bags of 30 for £1 – BARGAIN)
1 x chunky toggle clasp
1 metre of tiger tail
4 x crimp beads
Flat nosed pliers

The technique here is very similar to that of the wave necklace I wrote about before – it’s a straight forward tiger tail necklace, made special by the way the beads all sit when they’re tight together.
First off, pop 2 crimp beads on the end of the tiger tail. Put on half of the toggle clasp on next, and then feed the end of the wire back through the 2 crimps. Use the flat nosed plier to give the crimps a damn good squishing!
We’re using 2 crimps here instead of the normal one because it just adds a bit of extra safety to the necklace, necessary because all that crystal does have a bit of weight behind it.

Now you can thread your beads on, pushing the first few over the end of tiger tail that will be sticking out near your clasp to cover it.

Continue threading beads on until you’re happy with the length, try holding it up around your neck to double check where it’ll lie.
Once you’ve reached your desired look, thread on your remaining two crimp beads, and the other half of your clasp. Again, thread the end of the wire back through the two crimps and through a few beads at the end, pulling everything together tightly so that you don’t have any unsightly wire sticking out. Squish your crimps! And trim off your wire.

Tada! All done. These are so cool, I just can’t get enough of a statement necklace. And ridiculously, they cost less than a fiver to make. Madness!
Thank you for reading 🙂 And come hang out with us on Facebook, Twitter and Instagram, if you like.
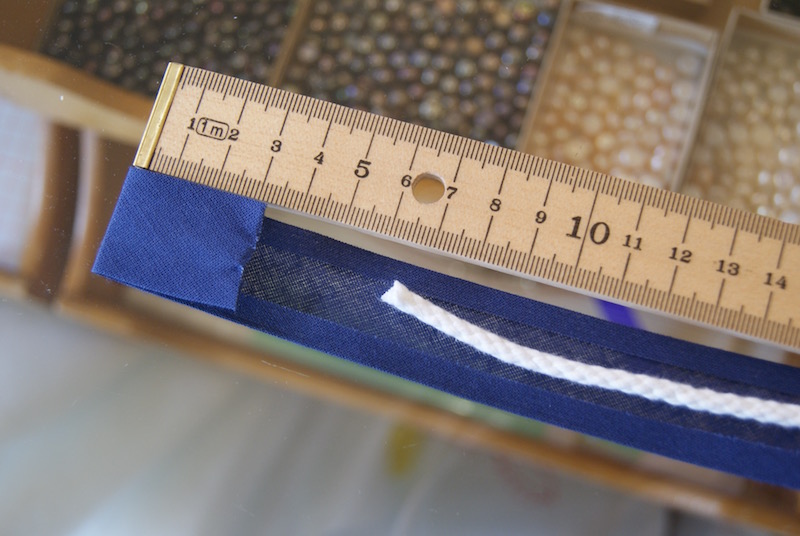
We’ve only recently started stocking piping cord in the shop, essentially because no one had asked for it until about a month ago. (Top tip: if you want us to stock something, just ask! We like knowing what we’re missing).
I’ve fancied having a play with it ever since, and have been noticing more and more people making piped cushion covers lately. Having just moved house, my current pillows are looking really sad in my new room so I thought this was a perf opportunity to try it out – which is why this is a much bigger pillow size than I normally would make!
Note: I don’t think I’ve ever actually used piping before, though I do remember doing homework about it in GCSE textiles amazingly. This was vaguely tricky, (probably on the same level of pom pom cushions, which we all know are life) but if you’re willing to give it a go and it not be 100% perfect then go for it! I basically mashed mine though the sewing machine and it came out pretty good, if I say so myself. (I’ve written this before I’ve actually taken it home and seen if it fits the cushion, so might not be so pleased with myself later.)

Before I started I read through this tutorial, and used it to work out my measurements etc.
You will need:
Front fabric (equals the size of your cushion, plus 1.25cm on the height & width)
Back fabric (the length of your cushion, plus 18cm on the width, cut in half to make two rectangles)
Piping Cord (I used size 4, and you need enough to go around the entire edge of your cushion, plus a touch extra for safety)
Bias Binding (you can make this yourself, if you’re a better person than I am. You need the same amount as the piping cord….)
Sewing Machine, unless you really really love to hand sew
Scissors, Pins, Iron
First things first, fold down one of the long edges on your back fabric 1cm, then 1cm again, hiding the raw edge. Press into place with an iron, and pin into place if you need to. (Reasons you might need to: you didn’t actually iron it, like me).

Stitch down with your sewing machine, and repeat on the other piece of back fabric.

Now the piping fun begins.

Starting about 5cm from the top of the binding, lay your piping along the middle of your bias, wrap the binding around it and pin together. I started doing this, decided it was too thin and went back and opened the binding out before pinning it. I have no idea if that was the right thing to do or not, but it seemed to work out ok.

You binding should have wrong sides touching

This is a representation of how my brain felt during this

Now, sew this together, but don’t sew the 5cm you left at one end.
This was where I started to get in a faff, because I realised that the foot on the machine would stop me getting that close to the piping. So I stitched it down, but quite near the edge.


Now, what the other tutorial I read said to do next was to pin this around the edges of your front piece (piping facing inwards) and stitch it into place, clipping your corners as you go to get it to sit better.
I obviously ignored this, and decided that I knew better and that I should just skip right to the end. THIS WAS AN ERROR. Do not do this. It was really difficult and the piping kept moving around all the time and the corners were super hard.
At the point where your two ends of piping meet, you’ll hopefully have a little bit extra. Trim the piping so it meets perfectly, and then tuck the 5cm end of binding over the other end, meaning you’ll have two layers of bias binding over a small section of piping.

So hopefully if you have taken my advice you now have a beautifully attached piece of piping cord to the front piece of your cushion, in which case all you need to do now is lay your 2 back pieces face down, overlapping in the middle.
I don’t, so what I’m doing here is laying the piping cord around the edge of the right side of the front piece, then laying the two back bits face down so they overlap in the middle, and the pinning this all into place. Sigh, hindsight…

All you have to do now is sew around the outside of the cushion. I used my zipper foot instead of the standard one so that I could get a bit closer to the piping cord, because I didn’t want it to be weird and gappy.
Once you’ve done that, flip it right side round, clip the corners and give it a good press with the iron. And that’s it!
Update: through some sewing miracle, it fit my cushion! Woop woop. Now I just have to make 2 more matching ones…
I’d love to hear if you’ve given this a go – let me know!
Don’t forget to befriend us on Facebook/Twitter/Instagram for nice photos and shop updates…
xx

This is one of the most popular necklace designs we sell in the shop – and they’re so simple! Read on to find out how to piece one together….
You will need: 7 x metal arrowhead charms, 8 x 8mm jump rings, chain in a length of your choice (we go for 16″), flat nose plier, wire cutter.

Using your flat nose pliers, hold one jump ring so that the split in it is at the top of the ring. Use your pliers to ease the ring open by pushing it away from you.

Loop the ring on to one arrowhead, and then another. Make sure the arrowheads will both be facing the right way when the ring is closed!

Use your pliers to close the jump ring carefully.

Repeat this with all your arrowheads, making sure you’ve got a jump ring on either end of the piece.

Carefully, use your wire cutters to cut your chain exactly in the middle, so you have two equal lengths.

Attach the chain to either end of the arrowheads using the jump rings.
And that’s it! We have these arrowheads in silver and gold, and both make really beautiful necklaces….


Earring making is one of the most useful and gratifying forms of jewellery making, and once you’ve mastered the basic techniques you can whip up all sorts of beautiful designs mega quickly! Below you’ll find a tutorial to make some lovely & simple drop earrings, that require basic earring making skills (I’ll do my best to describe these below!).
You will need: 4 x drop flower beads, 4 x headpins, 2 x earring hooks, 2 x jump rings, flat nose pliers, round nose pliers. wire cutters.

First of all, pop one of your beads on to one of your headpins. Use your wire cutters to trim a little bit of excess off the headpin – how much is up to you!

Using your round nose pliers, pinch the wire about 1cm down from the top, and bend to the side to it’s sitting at a 90 degree angle. Then, using the same pliers, grab the wire right at the end and turn over to make a loop. Repeat on the other pin.

Use your flat nose pliers to open up one of your jump rings, pop both of your dangles on, and close again.

Now use the same pliers to open up the bottom of one earring hook, pop the jump ring on, and close. Repeat for your second earring, and voila! All done.

You can make a huge array of lovely earring designs using only this technique – time to get practising those loops!


